Now there are different ways via which you can easily change Cursor Thickness in Windows 10 and today we are going to discuss all of them here. Just note here that the changes made to cursor thickness would not work for third-party application such as visual studio, notepad++ etc. So without wasting any time let’s see How to Change Cursor Thickness in Windows 10 with the help of the below-listed tutorial.
3 Ways to Change Cursor Thickness in Windows 10
Make sure to create a restore point just in case something goes wrong.
3 Ways to Change Cursor Thickness in Windows 10 Method 1: Change Cursor Thickness in Windows 10 Settings Method 2: Change Cursor Thickness in Control Panel Method 3: Change Cursor Thickness in Registry Editor How to Change Cursor Blink Rate in Windows 10
Method 1: Change Cursor Thickness in Windows 10 Settings
Press Windows Key + I to open Settings then click on Ease of Access icon.
From the left-hand side menu click on “Cursor & pointer size“.
Now under Change cursor thickness drag the slider towards the right to increase (1-20) the cursor thickness.
Note: The preview will be shown of the cursor thickness in the box below the heading “Cursor thickness“. 4. If you want to decrease the thickness of the cursor then drag the slider towards the left-hand side.
- Once finished, close settings and reboot your PC to save changes.
Method 2: Change Cursor Thickness in Control Panel
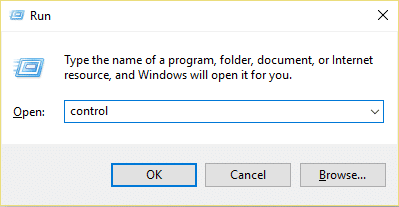
Press Windows Key + R then type control and hit Enter to open Control Panel.
Inside Control Panel click on “Ease of Access” link.
Under “Explore all settings” click on “Make the computer easier to see“.
Now scroll down to “Make things on the screen easier to see” section and then from the “Set the thickness of the blinking cursor” drop-down select the cursor thickness (1-20) you want.
Once finished, click Apply followed by OK.
Restart your PC to save changes.
Method 3: Change Cursor Thickness in Registry Editor
Press Windows Key + R then type regedit and hit Enter.
Navigate to the following registry key: HKEY_CURRENT_USER\Control Panel\Desktop
Select Desktop then in the right window pane double click on CaretWidth DWORD.
Under Base select Decimal then in the value data field type in a number between 1 – 20 for the cursor thickness you want, and click OK.
5.Close everything then reboot your PC.
How to Change Cursor Blink Rate in Windows 10
Press Windows Key + Q to bring up the search then type keyboard and then click Keyboard from the search result.
Under Cursor blink rate adjust the slider for the blink rate you want.
Once done, click Apply followed by OK. Recommended:
How to Change CPU Process Priority in Windows 10 How to Change Country or Region in Windows 10 Enable or Disable Secure Login in Windows 10 How to Enable or Disable Cortana in Windows 10
That’s it you have successfully learned How to Change Cursor Thickness in Windows 10 but if you still have any questions regarding this tutorial then feel free to ask them in the comment’s section.


![]()


