Whenever you upgrade to a newer build, Windows typically reset your app associations to default and thus you lose all your customization and app associations in Windows 10. In order to avoid this scenario you could export your default app associations and whenever needed you can easily import them back. So without wasting any time let’s see How to Export and Import Default App Associations in Windows 10 with the help of the below-listed tutorial.
Export and Import Default App Associations in Windows 10
Make sure to create a restore point just in case something goes wrong.
Export and Import Default App Associations in Windows 10 Method 1: Export Custom Default App Associations in Windows 10 Method 2: Import Custom Default App Associations for New Users in Windows 10 Method 3: Completely Remove Custom Default App Associations
Method 1: Export Custom Default App Associations in Windows 10
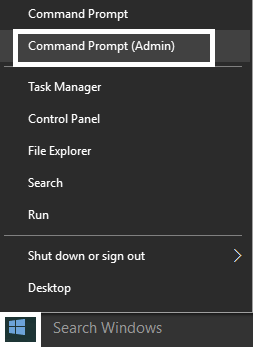
1.Press Windows Key + X then select Command Prompt (Admin).
2.Copy & paste the below command into cmd and hit Enter:
Note: As soon as you hit Enter, there would be a new file on your desktop with the name “DefaultAppAssociations.xml” which would contain your custom default app associations.
3.You can now use this file to import your custom default app associations at any time you want. 4.Close the elevated command prompt and then restart your PC.
Method 2: Import Custom Default App Associations for New Users in Windows 10
You can either use the above file (DefaultAppAssociations.xml) to import your custom default app associations or import them for a new user. 1.Login to your desired user account (Either your user account or the new user account). 2.Make sure to copy the above-generated file (DefaultAppAssociations.xml) to the user account you just logged into.
Note: Copy the file to the desktop for the particular user account. 3.Now copy & paste the following command into cmd and hit Enter:
4.As soon as you hit Enter you will set a custom default app associations for the particular user account. 5.Once done, you can now close the elevated command prompt.
Method 3: Completely Remove Custom Default App Associations
1.Press Windows Key + X then select Command Prompt (Admin).
2.Copy & paste the below command into cmd and hit Enter: Dism.exe /Online /Remove-DefaultAppAssociations
3.Once the command finish processing, close the elevated command prompt. Recommended:
Decrypt EFS Encrypted Files and Folders in Windows 10 Allow or Prevent Users from Changing the Date and Time in Windows 10 How to Change Date and Time Formats in Windows 10 3 Ways to Change Cursor Thickness in Windows 10
That’s it you have successfully learned How to Export and Import Default App Associations in Windows 10 but if you still have any questions regarding this tutorial then feel free to ask them in the comment’s section.


