What is Chkdsk and When to Use It?
Errors in disks are a common issue which many users face. And that is why Windows OS comes with an in-built utility tool called chkdsk. Chkdsk is basic Windows utility software which scans for hard disk, USB or external drive for errors & can fix file-system errors. CHKDSK basically make sure that the disk is healthy by inspecting the physical structure of the disk. It repairs problems related to lost clusters, bad sectors, directory errors, and cross-linked files.
What is Chkdsk and When to Use It? How to Check Disk for Errors Using chkdsk Method 1: Check your hard disk for errors using Chkdsk GUI Method 2: Run Check Disk (chkdsk) from Command Line Method 3: Run Disk Error Checking using PowerShell Method 4: Check your disk for errors using Recovery Console
Some key features of chkdsk are: It is recommended to run chkdsk utility as a part of regularly scheduled maintenance and other S.M.A.R.T. tool for drives that support it. It would help if you considered running chkdsk whenever Windows shut down randomly, system crashes, Windows 10 freezes etc.
How to Check Disk for Errors Using chkdsk
Make sure to create a restore point just in case something goes wrong.
Method 1: Check your hard disk for errors using Chkdsk GUI
Here are the steps to perform chkdsk manually through GUI:
Open your system’s File Explorer then from the left-hand side menu, select “This PC“.
Right-click on the specific disk drive for which you want to run chkdsk. You can also run the scan for a memory card or any other removable disk drive.
Select “Properties” from the context menu and then switch to Tools under the Properties window.
Now under Error-checking section, click on the “Check” button. For Windows 7, this button name will be “Check now.”
Once the scan is finished, Windows will inform you that ‘it has not found any errors on the drive’. But if you still want, you can perform a manual scan by clicking on “Scan drive“.
Initially, this will carry out a scan without performing any repair tasks. Hence no restart required for your PC.
After the scanning of your drive is complete, and if no errors are detected, you can click on the “Close” button.
For Windows 7, when you click the “Check now” button, you will observe a dialog box that lets you select a couple of extra options like whether any automatic fixing of errors in the file system is required and scan for bad sectors, etc.
If you wish to carry out these thorough disk check; select both options & then press the “Start” button. This will take some time to scan your disk drive sectors. Do this when you don’t need your system for a few hours. Also see: How to Read Event Viewer Log for Chkdsk in Windows 10
Method 2: Run Check Disk (chkdsk) from Command Line
In case, you are not certain if a disk check is listed for your next restart, there is another easy way to check your disk using the CLI – Command Prompt. The steps are:
Press Windows key + S to bring up search, type “command prompt” or “cmd“.
Right-click on the Command Prompt from the search result and select “Run as administrator.”
In the command prompt, type the following command along with the drive letter: chkdsk C: Note: Sometimes Check Disk cannot start because the disk you want to check is still being used by the system processes, so disk check utility will ask you to schedule the disk check on the next reboot, click yes and reboot the system.
You can also set parameters using switches, f / or r example, chkdsk C: /f /r /x
Note: Replace C: with the drive letter on which you want to run Check Disk. Also, in the above command C: is the drive on which we want to check disk, /f stands for a flag which chkdsk the permission to fix any errors associated with the drive, /r let chkdsk search for bad sectors and perform recovery and /x instructs the check disk to dismount the drive before beginning the process. 5. You can also substitute the Switches which are /for /r etc. To know more about switches type the following command into cmd and hit Enter: CHKDSK /?
When your OS will schedule an automatic check-in the drive, you will observe that a message will be displayed to let you know that the volume is dirty and has potential errors. Otherwise, it will not schedule an automatic scan.
So, a disk check will be scheduled for the next time you launch Windows. There is also an option to cancel the check by typing the command: chkntfs /x c:
Sometimes users find Chkdsk at boot very annoying and time-consuming, so see this guide to learn How To Cancel a Scheduled Chkdsk in Windows 10. Also Read: Fix The Disk Check Could Not be Performed Because Windows Cannot Access the Disk
Method 3: Run Disk Error Checking using PowerShell
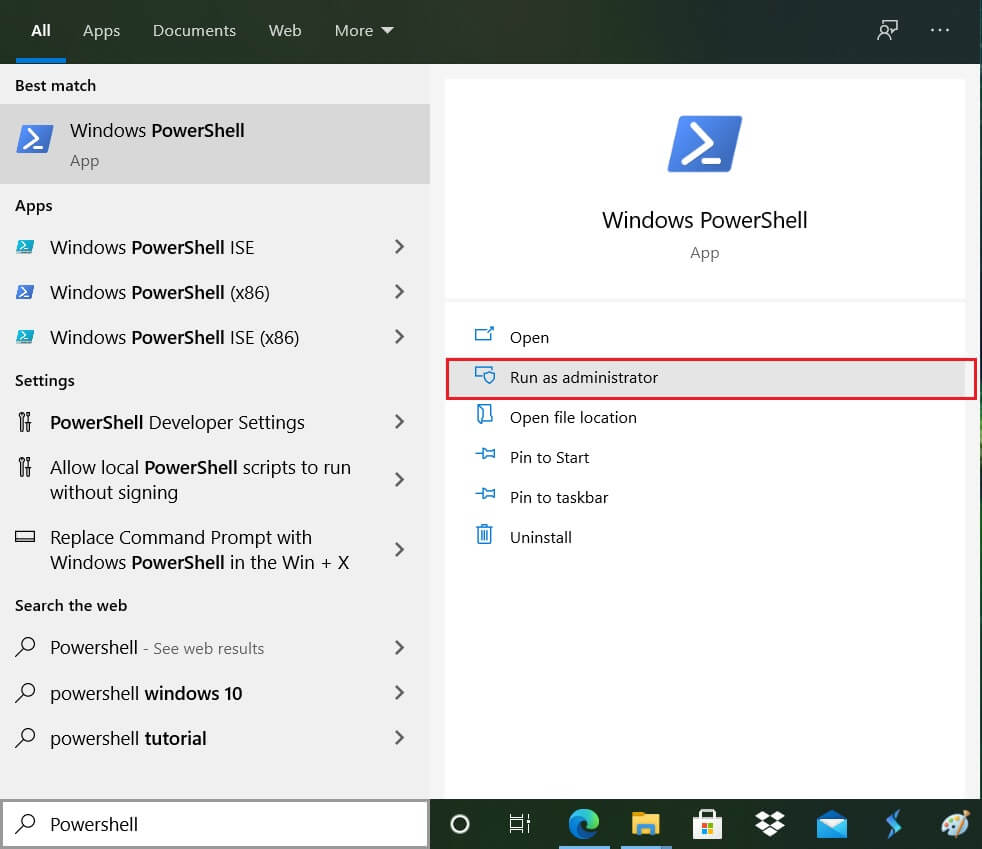
Type PowerShell in Windows Search then right-click on PowerShell from the search result and select Run as Administrator.
Now type one of the following commands into PowerShell and hit Enter: Note: Substitute “drive_letter” in the above command with the actual drive letter you want.
Close PowerShell restart your PC to save changes.
Method 4: Check your disk for errors using Recovery Console
Insert the Windows 10 bootable installation DVD and restart your PC.
When prompted to Press any key to boot from CD or DVD, press any key to continue.
Select your language preferences, and click Next. Click Repair your computer in the bottom-left.
On choose an option screen, click Troubleshoot.
On Troubleshoot screen, click the Advanced option.
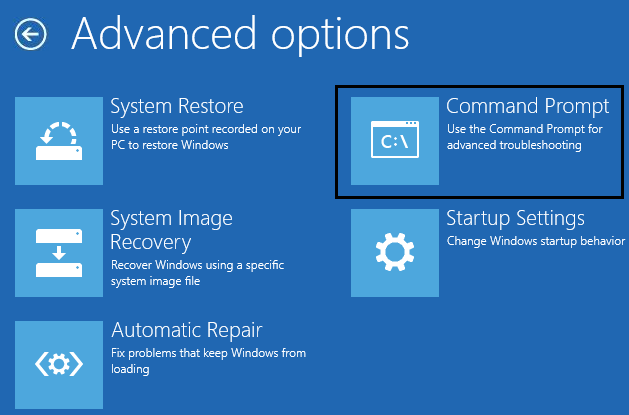
On the Advanced options screen, click on Command Prompt.
Run the command: chkdsk [f]: /f /r. Note: The [f] designates the disk which needs to be scanned. Recommended:
What is Sync Center & How to Use it in Windows? How to get back your Volume Icon in Windows Taskbar? Create Full Backup of your Windows 10 (System Image) What to Do When Your Laptop Suddenly Has No Sound?
I hope this article was helpful and you can now easily Check Disk for Errors Using chkdsk, but if you still have any questions regarding this tutorial then feel free to ask them in the comment’s section.