But if you want to disable the Live tile preview for all the applications completely, then there are no such settings in Windows 10. But there is a registry hack through which this can be easily achieved. So without wasting any time let’s see How to Disable Live Tiles in Windows 10 Start Menu with the help of the below-listed guide.
How to Disable Live Tiles in Windows 10 Start Menu
Make sure to create a restore point, just in case something goes wrong.
How to Disable Live Tiles in Windows 10 Start Menu Method 1: Unpin the tile from Start Menu Method 2: Turn Off Live Tiles Method 3: Disable Live Tiles using Group Policy Editor Method 4: Disable Live Tiles using Registry Editor
Method 1: Unpin the tile from Start Menu
Although this will only work for a particular application, this method is sometimes useful if you want to disable the Live tiles for a particular app.
Click on Start or press Windows Key on the keyboard.
Right-click on the particular app, then selects “Unpin from Start.”
This will successfully remove the particular tile from the Start Menu.
Method 2: Turn Off Live Tiles
Click on Start or press Windows Key on the keyboard.
Right-click on the particular app then chooses More.
From the Choose menu, click on “Turn Live Tile Off“.
This will disable Live tiles in Windows 10 Start Menu for a particular app.
Method 3: Disable Live Tiles using Group Policy Editor
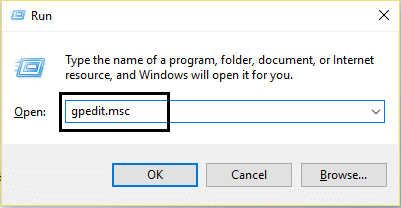
Press Windows Key + R then type gpedit.msc and hit Enter.
Now, under Group Policy Editor, navigate to the following path: User Configuration -> Administrative Templates -> Start Menu and Taskbar -> Notifications
Make sure to select Notifications then from right window pane double-click on “Turn off tile notifications.”
Make sure to set it to Enabled then click Apply followed by OK.
This will disable live tiles feature for all apps on Start Screen.
Method 4: Disable Live Tiles using Registry Editor
Press Windows Key + R then type regedit and hit Enter.
Now navigate to the following registry key: HKEY_CURRENT_USER\Software\Policies\Microsoft\Windows\CurrentVersion
Right-click on CurrentVersion then select New > Key and then name this key as PushNotifications.
Now right-click on PushNotifications key and select New > DWORD (32-bit) value.
Name this new DWORD as NoTileApplicationNotification and then double-click on it.
Change the value of this DWORD to 1 and click OK.
Close Registry Editor and reboot your PC to save changes. Recommended:
Fix Windows 10 Update Error 0x8e5e0147 Fix Computer does not start until restarted multiple times How to Fix Windows Update Error 0x8007007e Disable Windows 10 Microsoft Edge Notification
That’s it you have successfully learned How to Disable Live Tiles in Windows 10 Start Menu but if you still have any questions regarding this post then feel free to ask them in the comment’s section.