How to Permanently Disable Microsoft Edge in Windows 11
The only way how to permanently disable Microsoft Edge on Windows 11 is to modify all of the default file types and link them to a different browser. Follow the given steps to do so:
Click on Start and type Settings in the search bar. Then, click on Open, as depicted.
In the Settings window, click on Apps in the left pane.
Then, click on Default apps in the right pane, as shown.
Type Microsoft Edge in the Search box provided and click on Microsoft Edge tile.
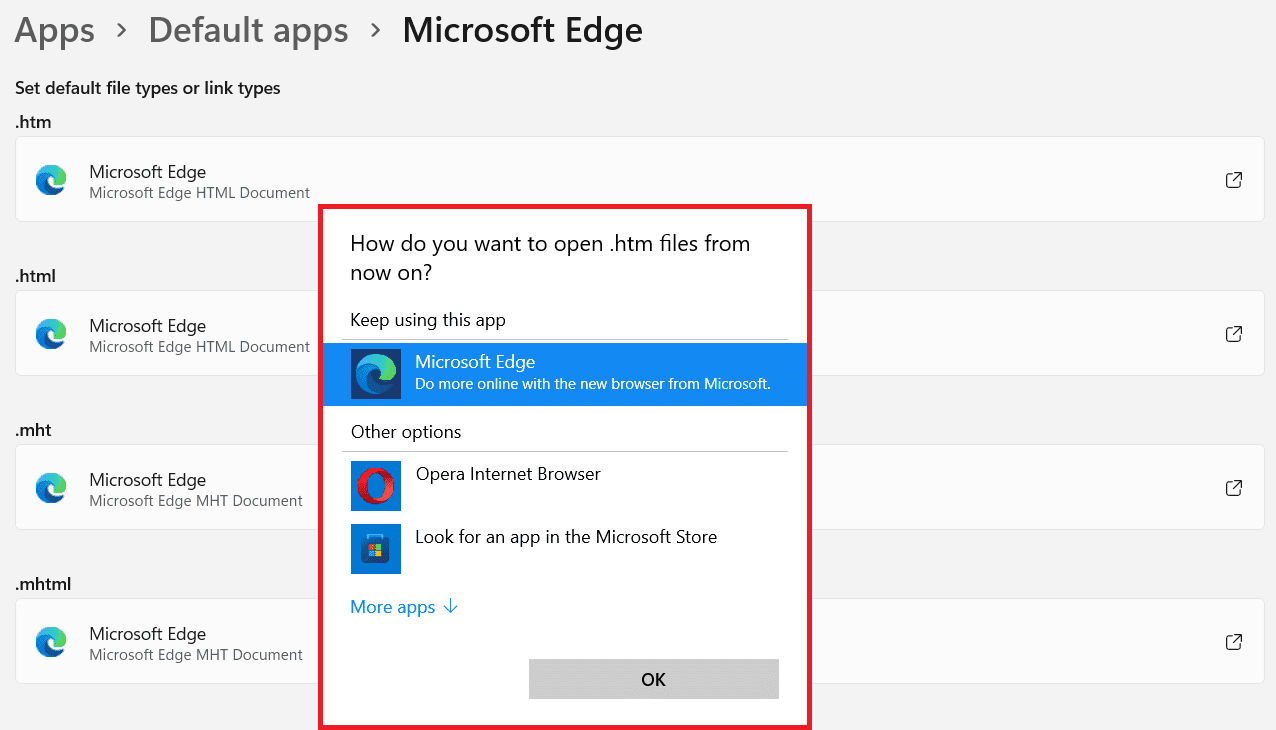
5A. Choose a different web browser from Other options to set it for the respective file or link type. Repeat the same for all file types such as .htm, .html, .mht & .mhtml.
5B. In case, you do not find the application of choice from the given list, click on Look for another app on this PC and navigate to the installed app.
- Finally, click on OK to set it as the default app for all file & link types. Recommended:
Best External Hard Drive for PC Gaming How to Change PIN in Windows 11 How to Hide Recent Files and Folders on Windows 11
We hope you found this article interesting and helpful on how to disable Microsoft Edge in Windows 11. You can send your suggestions and queries in the comment section down below. Stay tuned for more information on Windows 11!