Slow walkers, loud chewers, travel delays, poor WiFi or internet connection, and a laggy computer are some of the world’s most annoying things. As it turns out, your personal computer can run slow even if you have ample free storage. To multitask efficiently and simultaneously shift between multiple applications without experiencing any lag, you need to have adequate free RAM along with a relatively empty hard drive. Firstly, if you aren’t already aware of what RAM is and why it is so important, check out RAM (Random Access Memory). Coming back to the topic, your computer RAM can often run low since all your active applications and background processes & services utilize it. Apart from this, memory leaks, high-impact startup applications, power surges, presence of malware, hardware defects, and insufficient RAM itself can cause your computer to slow down. While Windows usually does an excellent job at managing RAM, there are a few extra steps that you can take to free some clogged up & much-needed additional RAM and speed up your computer’s performance.
9 ways to free up RAM on Windows 10
The most obvious and easiest way to free up some RAM is to purge applications and processes that are hogging up unnecessary system resources. These could be one of the many third-party applications you have installed or even the native tools Microsoft includes in Windows. You can either choose to disable or entirely uninstall a troublesome program.
9 ways to free up RAM on Windows 10 Method 1: Terminate background processes & disable high impact startup apps Method 2: Uninstall or Disable Bloatware Method 3: Disable background applications Method 4: Scan for virus and malware Method 5: Turn off Visual Effects Method 6: Increase Virtual Memory Method 7: Clear Pagefile At Shutdown Method 8: Disable browser extensions Method 9: Perform a Disk Cleanup Scan
Although, if removing something, whether third-party or built-in, seems a little too much, you can try increasing your virtual memory, disabling the visual effects, clearing temporary data, etc. Before we get started, restart your computer to clear all the system RAM and reset all the background processes. While this might not free up RAM on Windows 10, it will help restart any corrupt process and application that might be utilizing more resources than it needs.
Method 1: Terminate background processes & disable high impact startup apps
The Windows Task Manager does an incredible job informing you about the exact amount of RAM being utilized by all the active programs and processes. Along with checking your computer’s RAM usage, one can also have a look at the CPU & GPU usage and end tasks, prevent applications from using resources at computer startup, start a new task, etc.
Press the Windows key on your keyboard to bring up the start menu and start typing Task Manager. Click on Open when search results arrive (or use the shortcut key combination Ctrl + Shift + Esc).
Click on More Details to have a look at all the background processes, services, performance stats, etc.
In the Processes tab, click on the Memory header to sort all the processes & applications currently running on your computer based on their memory (RAM) usage.
Make a mental note of all the processes and applications utilizing the most memory. As mentioned earlier, you can either choose to End these processes or completely uninstall them. 5. To end a process, right-click on it and select End Task from the ensuing options menu (You can also click on the End Task button at the bottom of the window, which unlocks after selecting a process). Also, be careful when ending a Microsoft process as it may lead to Windows malfunction and several other issues.
Now, let’s switch to the Startup tab and disable a few other suspicious and power-hungry applications.
Click on the Startup impact column header to sort all the applications based on their impact on the computer startup process. High, medium and low are the three ratings assigned to applications based on their impact. As obvious, the ones with a high rating impact your startup time the most.
Consider disabling any third-party application that has been assigned a high impact rating to reduce your boot times. Right-click on an application and select Disable (or click on the Disable button).
You can also acquire more detailed information regarding the most power-hungry applications via the Performance tab of the Task Manager.
In the Performance tab, select Memory from the left side and click on Open Resource Monitor.
In the following window, you will see a horizontal bar displaying the amount of free and currently in use RAM along with a list of applications and their memory usage. Click on Commit (KB) to sort applications based on the amount of memory they are using.
Uninstall any suspicious application with unusually high memory usage or switch to another similar application, perhaps a lite version of the same one. Also Read: How to Use Performance Monitor on Windows 10
Method 2: Uninstall or Disable Bloatware
After checking the Task Manager, you will have a better idea and know exactly which applications are causing high memory issues. If you do not use these applications on a regular basis, consider uninstalling them to free up ram on Windows 10 PC. There are two ways by which you can uninstall applications from your Windows computer, through the Control Panel or via the Settings application.
Let’s take an easier and more straightforward route. Press Windows key + X or right-click on the start button and select Settings from the power user menu.
Next, click on Apps.
Make sure you are on the Apps & Features settings page and scroll down on the right-side panel to find an application you would like to uninstall. Click on an app to expand its options and then select Uninstall.
Click Uninstall again on the ‘This app and its related info will be deleted’ pop-up. (Click on Yes or OK on any other pop-ups that may arrive asking for your confirmation)
Method 3: Disable background applications
Windows includes a number of built-in applications/tools that are allowed to run in the background continuously. Some of these are important as they perform essential activities like displaying notifications, updating start menu tiles, etc. but a few of them serve no important purpose. You can disable these non-essential background applications to free up system resources.
Open up Windows Settings again by pressing Windows key + I and click on Privacy.
From the left side navigation menu, click on Background apps (under App permissions).
Shift the toggle switch under ‘Let apps run in the background’ to off if you do not want to allow any application to run in the background. You can also individually select which applications can run in the background and which ones can’t.
Method 4: Scan for virus and malware
While checking the Task Manager, you might have found an application or two that you don’t remember installing. These unknown applications can be malicious and may have found their way in through another application (Always be wary when installing pirated software or programs from unverified sources). Malware and viruses while trying to steal your personal info also utilize most of your system resources leaving very little for other applications. Perform regular antivirus/antimalware scans to check and remove any threats to your computer. There are a number of security programs that you can use to remove malware, although Malwarebytes is one of the most recommended and also our favorite.
Visit the Malwarebytes Cybersecurity website in a new tab and download the installation file. Once downloaded, open the installation wizard and follow all the on-screen prompts to install the security program.
Open the application and perform a Scan for malware.
The scan will take quite some time to finish as it goes through all items (registry, memory, startup items, files) on your computer with a fine-toothed comb.
Neutralize all the threats Malwarebytes detects by clicking on Quarantine. Once you restart your PC, see if you’re able to free up RAM on Windows 10 Computer, if not, then continue with the next method.
Method 5: Turn off Visual Effects
Apart from disabling and removing applications, there are a few other things that you can change to increase the amount of free RAM. Windows incorporates various animations to create an aesthetically pleasing user experience. While these subtle animations & visual effects only use a few megabytes of computer memory, they can be disabled if necessary.
Double-click on the Windows File Explorer shortcut icon on your desktop to launch it or use the shortcut key Windows key + E.
Right-click on This PC (present on the left navigation panel) and select Properties from the context menu.
In the following window, click on Advanced System Settings.
Click on the Settings… button inside the Performance sub-section of the Advanced system properties tab.
Finally, click on the radio button next to ‘Adjust for best performance’ to enable the option and consequently disable all Windows animations or select Custom and manually check the boxes next to the visual effects/animations you would like to keep.
Click on Apply, followed by OK to save your changes and close the window. This will dramatically affect the appearance of Windows but allows for a much snappier workflow.
Method 6: Increase Virtual Memory
RAM, while mostly stand-alone, relies on other components too. A paging file is a form of virtual memory available on every hard drive and works alongside RAM. Your computer automatically transfers applications to the paging file when your system RAM starts running low. However, the paging file can also run soft and prompt errors such as ‘Your system is low on virtual memory’. Paging file, being a virtual memory, allows us to increase its value manually and, therefore, boost our computer’s performance.
Follow steps 1 through 4 of the previous method to open the Performance Options window.
Click on Change… under the Virtual Memory section of the Advanced tab.
Untick the box next to ‘Automatically manage paging file size for all devices’. This will unlock the options to set a custom initial and maximum virtual memory size for each drive.
Now, select the C drive (or the drive you have installed Windows on) and enable Custom Size by clicking on its radio button.
Set the Initial Size (MB) to one and a half times your system RAM and the Maximum Size (MB) to three times the Initial Size. Click on Set followed by OK to save and exit.
Method 7: Clear Pagefile At Shutdown
While all things on your RAM are cleared automatically when you restart your computer, the same isn’t the case with the virtual memory. This is due to the fact that the pagefile actually occupies a physical space on the hard drive. Although, we can modify this behavior and clear the Pagefile every time a restart occurs.
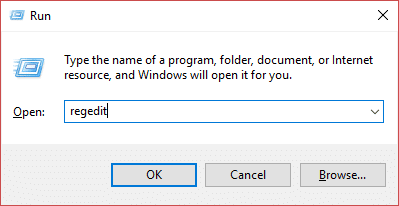
- Press Windows key + R to launch the Run command box, type regedit in it, and press enter to open the Registry Editor.
A user account control pop-up requesting your permission to complete the action will arrive. Click on Yes to grant the necessary permissions and continue. 2. In the left panel, double-click on HKEY_LOCAL_MACHINE to expand the same. 3. Navigate to the following path in the HKEY_LOCAL_MACHINE folder (or copy-paste the location in the address bar) HKEY_LOCAL_MACHINE\SYSTEM\CurrentControlSet\Control\Session Manager\Memory Management. 4. Now, on the right-panel, right-click on ClearPageFileAtShutdown and select Modify.
- In the following dialog box, change the Value Data from 0 (disabled) to 1 (enabled) and click on OK.
Method 8: Disable browser extensions
Usually, a shortage of RAM occurs when you have multiple tabs open in your browser. Google Chrome, the most used web browser across platforms, is infamous for its RAM handling capabilities and slowing down Windows computers dramatically. To prevent browsers from using extra RAM, avoid keeping multiple tabs open and disable or uninstall unnecessary extensions that run alongside the browsers.
The procedure to disable extensions on every browser is simple and fairly similar.
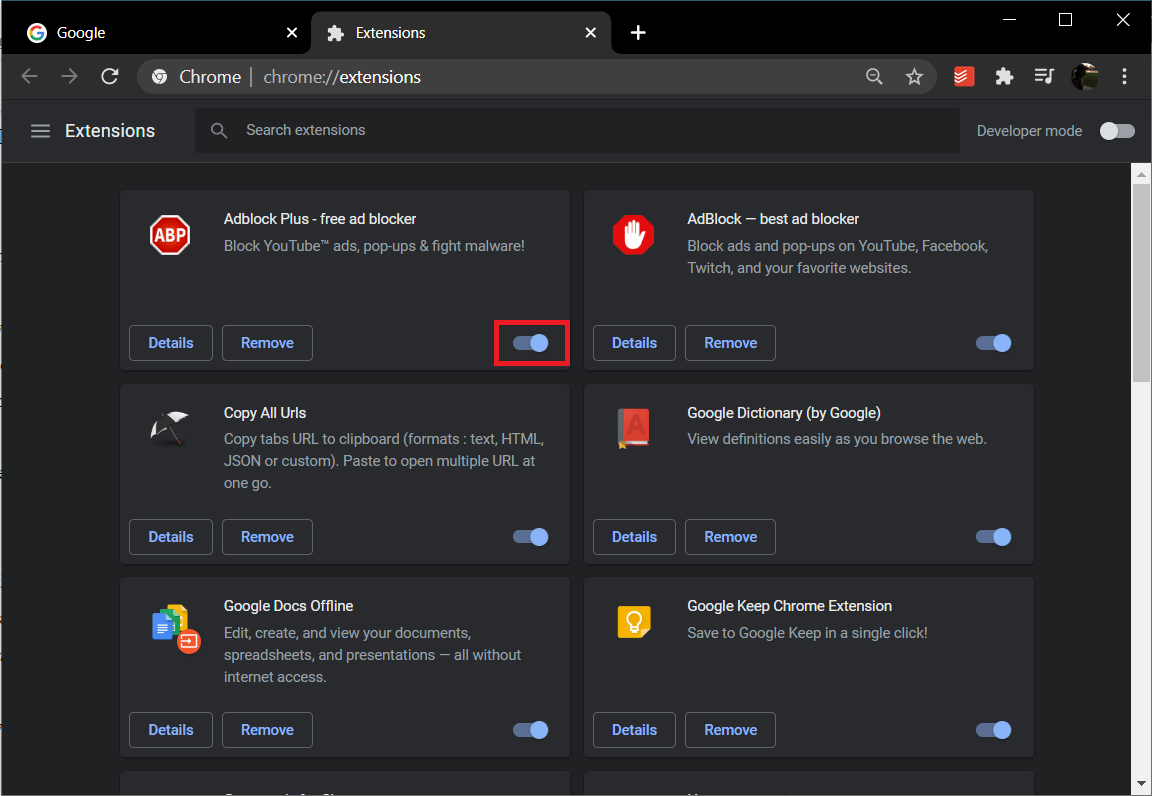
For Chrome, click on the three vertical dots at the top-right corner and hover your mouse over More Tools. Click on Extensions from the sub-menu.
As for Mozilla Firefox and Microsoft Edge, visit about: addons and edge://extensions/ in a new tab, respectively.
Click on the toggle switch next to an extension to turn it off. You will also find the option to uninstall/remove nearby.
Restart your PC and see if you’re able to free up some RAM on your computer.
Method 9: Perform a Disk Cleanup Scan
A few regularly used applications may fail to release the system memory they were using, leading to RAM running common issues. Along with them, you can try clearing all the temporary files that Windows automatically creates, Windows upgrade log files, memory dump files, etc. using the built-in Disk Cleanup application.
Press Windows key + S, type Disk Cleanup in the search bar, and press enter.
Select the drive you would like to clear temporary files from and click on OK. The application will now start scanning for temporary files and other unwanted stuff and can be deleted. Wait for a while and let the scan complete.
Under Files to delete, check the box next to Temporary files. Go ahead and select any other files you would like to delete (for example, temporary internet files, recycle bin, thumbnails).
Click on OK to delete the selected files.
Furthermore, type %temp% in either the start search bar or Run command box and press enter. Select all the files in the following window by pressing Ctrl + A and hit the delete key. Grant administrative privileges whenever required and skip files that can’t be deleted. You can perform all the above RAM freeing activities on a regular basis to maintain your computer’s performance. Also, on your quest to increase the amount of free RAM, you might be tempted to install one of those RAM cleaning tools which proclaim to improve performance but do not give in, as they are usually a hoax and will not provide you with any additional free RAM. Instead of RAM cleaners, you can try using RAM manager applications such as Memory Optimizer and CleanMem. Lastly, with developers adding new features in every new release of an application, the amount of RAM they require also increases. If possible, try installing more RAM, especially if you are using an older system. Check the instruction manual that came with your computer or perform a Google search to figure out what kind of RAM is compatible with your laptop and how to install it. Recommended: 15 Ways to Speed Up a Slow Windows 10 PC We hope this guide was helpful and you were able to easily free up some RAM on your Windows 10 Computer. But if you still have any queries regarding this guide then feel free to ask them in the comment section.