Avast antivirus is better than other free antivirus programs because it offers some unique features like a password manager, a gaming mode or movie mode attribute that helps to reduce unwanted interruptions, a wireless Wi-Fi scanner, and a ransomware shield to prevent the alteration of designated files. The Premium version of Avast protects essential files during a ransomware attack.
On the other hand, Avast takes a lot of time to scan your system; thereby, the performance of your computer slows down. Avast does not guarantee protection from phishing attacks. You have to be very cautious regarding this to avoid them. It sometimes takes auto start-ups when your system is turned on. Also, it does not have a firewall setup. Sometimes you might be annoyed by the voice of Avast that tells you to update the software. Due to these reasons, you may feel like uninstalling Avast and installing a new antivirus program. Here, you can learn how to remove Avast from Windows 10 and completely uninstall Avast. The below-mentioned methods also apply to Windows 8 and Windows 7.
How to Completely Remove Avast from Windows 10
Method 1: Use your device’s settings
- Open your Avast antivirus program on your computer by searching for it. When you open it, you can see the Menu option on the top right corner. Click on that.
How to Completely Remove Avast from Windows 10 Method 1: Use your device’s settings Method 2: Remove Avast by using the uninstall tool Method 3: Use third-party applications Method 4: Use the Registry Editor
Once you tap on Menu, you can see an option called Settings.
Click on Settings as shown below.
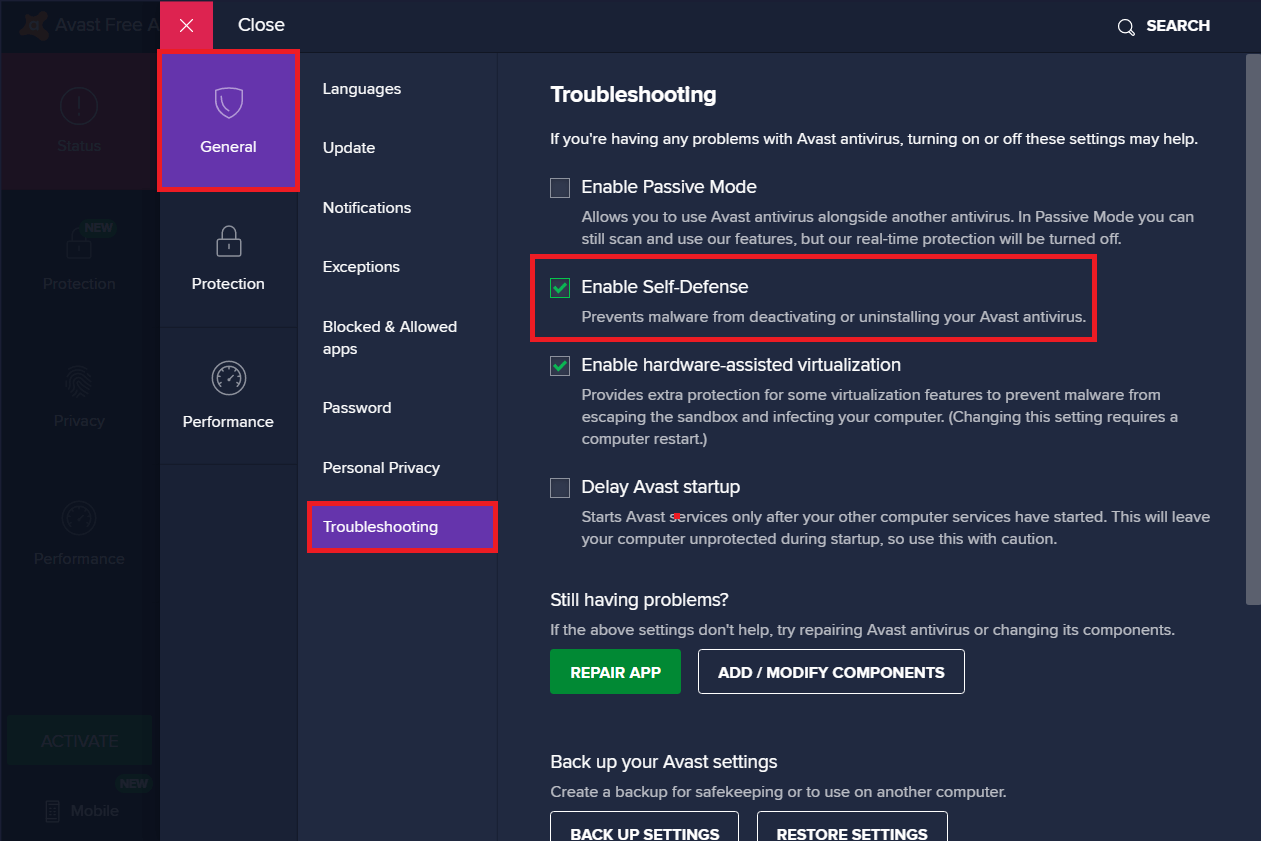
To the left of the Settings bar, select the General icon.
In the Troubleshooting menu, uncheck the Enable Self-Defense box.
Once you uncheck the box, a prompt will be displayed on the screen to ensure the attempt to disable Avast.
Click on OK.
Exit Avast antivirus program.
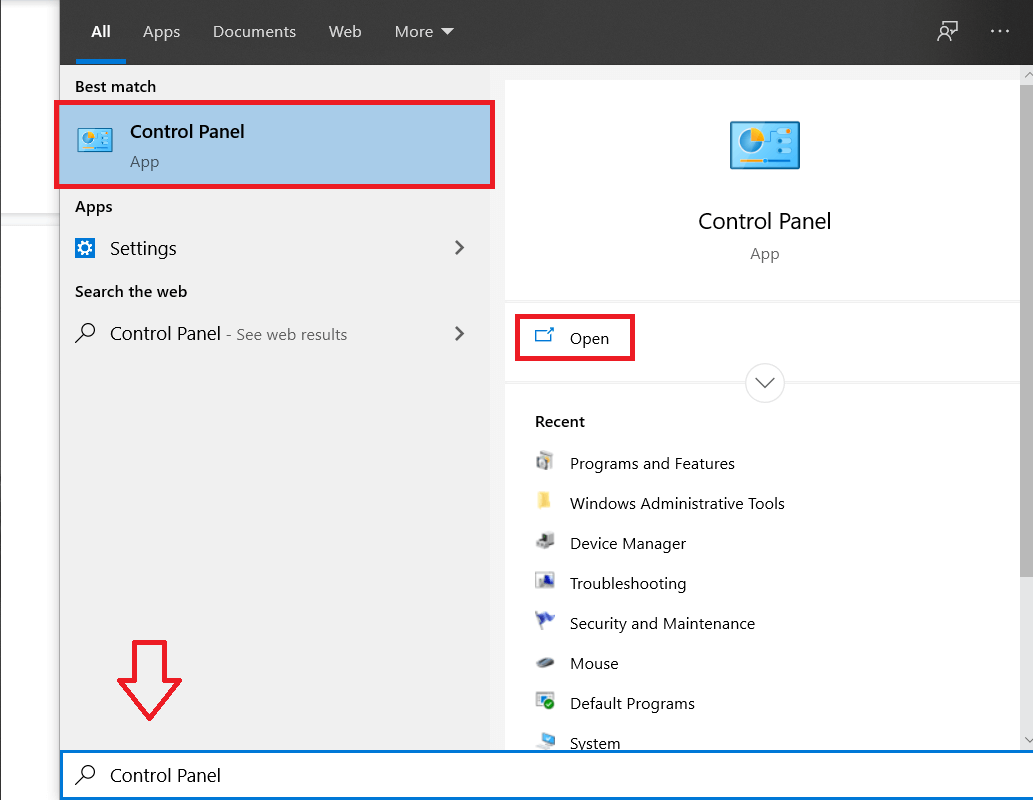
Go to the Search menu followed by Settings.
Launch Control Panel and select Programs.
Select Programs and Features.
Select Avast Free Antivirus and click on Uninstall.
Proceed by clicking Yes to the confirmation prompt. Depending upon the file size of Avast, the time taken to uninstall the application data will differ accordingly.
Restart your system. This method will be helpful to uninstall Avast antivirus from your system permanently. If you’re looking for faster ways, some methods are explained below.
Method 2: Remove Avast by using the uninstall tool
Download the extension avastclear.exe. You can download the Avast uninstaller utility by visiting this link.
Launch it as an administrator.
Start your Windows 10 system in safe mode.
Enter the program directory and data directory. If you do not know the exact location, you can leave it unchanged. The default location will be set in this case.
Click on Uninstall.
Wait for uninstallation to be completed and restart your system. Also Read: Fix Windows Cannot Find Steam.exe error
Method 3: Use third-party applications
You can use third-party applications to uninstall Avast permanently from the system. Here are some demonstrations:
Download and install CCleaner.
Run CCleaner then click on Tools.
A list of programs present on the computer will be displayed on the screen. You can select your desired program (Avast) and click on Uninstall.
The next step is to confirm your uninstallation process. Once you confirm the prompt, the process begins.
Restart your system once the uninstall process has been completed.
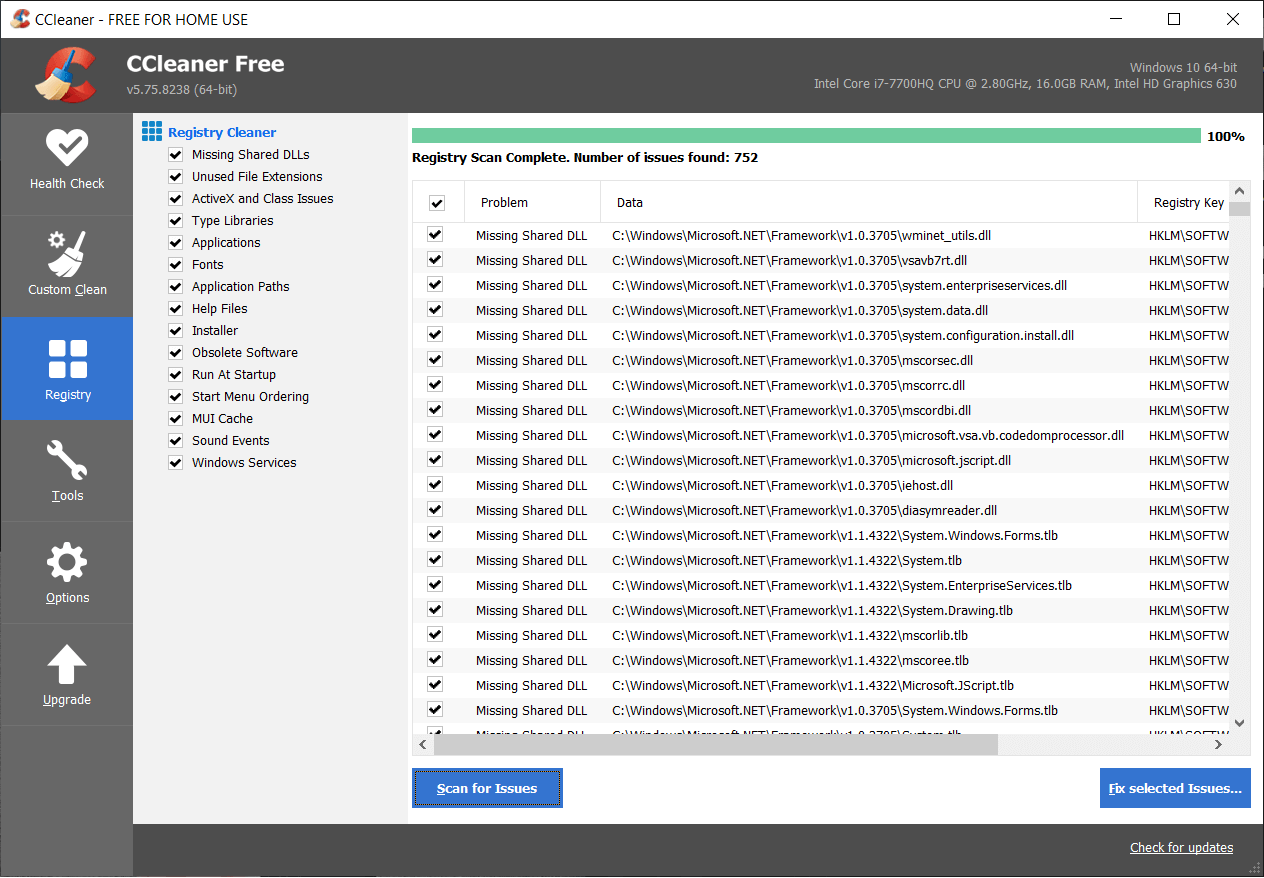
Go to CCleaner and click on Registry. Proceed by clicking Scan for Issues.
Once you click on it, proceed on the selected files by clicking Fix selected Issues….
Be sure that you don’t save the backup files of registry changes. Else, it won’t be possible to remove Avast from your system entirely.
Exit CCleaner.
Method 4: Use the Registry Editor
- Go to the Search menu.
- Type regedit and click on OK.
- Navigate to COMPUTER and enter HKEY_CURRENT_USER.
- Search for Avast Software by navigating to the Software field.
- You can delete Avast Software by right-clicking on it.
- Restart your system and check if it still exists in the Registry Editor. These four different methods demonstrate how to remove Avast from Windows 10 and how to uninstall Avast from your system completely. Remember, after uninstalling Avast from your system, ensure that you install another antivirus program on your computer. Several alternative antivirus programs are more reliable than Avast. A system without an antivirus program is more prone to several threats like security attacks, ransomware attacks, malware attacks, and phishing attacks. Always ensure you have a reliable antivirus system installed in your system and active state with proper licensing. If you have any questions regarding how to uninstall Avast from your system entirely, please feel free to ask us in the comment section. Recommended:
What is Malware and What Does it Do? Fix Laptop Camera Not Working on Windows 10 How to Compare Files in Two Folders on Windows 10 How to Fix Broken Registry Items in Windows 10
We hope this article was helpful and you were able to remove Avast from Windows 10. If you still have any queries regarding this article, then feel free to ask them in the comments section.