Windows Repair Install is also known as Windows 10 in-place upgrade or Windows 10 reinstallation. The benefit of Windows 10 Repair Install is that it reloads Windows 10 system files and configuration without deleting any user data.
How to Repair Install Windows 10 Easily:
Make sure of the following things before moving forward with Repair Install Windows 10:
How to Repair Install Windows 10 Easily: Create a Windows 10 Installation Media: Start Repair from the Installation Media:
-Ensure that your have at least 9 GB of free space on Windows drive (C:) -Have installation media (USB/ISO) ready. Make sure that the Windows setup is the same build and edition as the current Windows 10 installed on your system. -The Windows 10 setup must be in the same language as the Windows 10 already installed on your system. This is very important for keeping your files after the repair. -Make sure that you have downloaded the Windows setup in the same architecture (32-bit or 64-bit) as your current Windows 10 installation.
Create a Windows 10 Installation Media:
1.Download the Windows 10 setup from here. 2.Click on “Download tool now” and save the file to your PC. 3.Next, accept the license agreement.
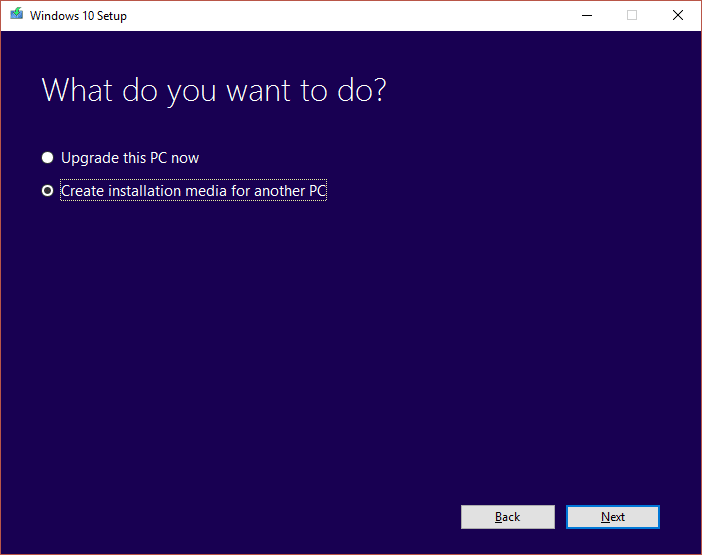
4.Select “Create installation media for another PC.”
5.On select language, architecture, and edition screen make sure that “Use the recommended options for this PC” is checked.
6.Now select ISO file and click Next.
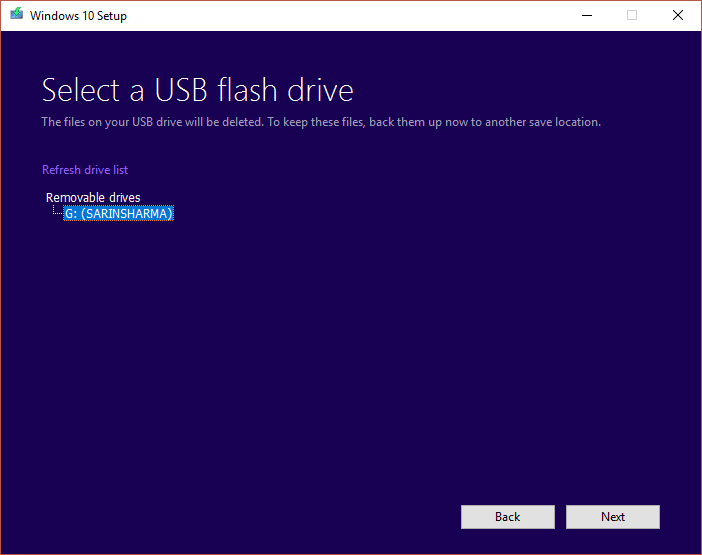
Note: If you wish to use USB flash drive then select that option.
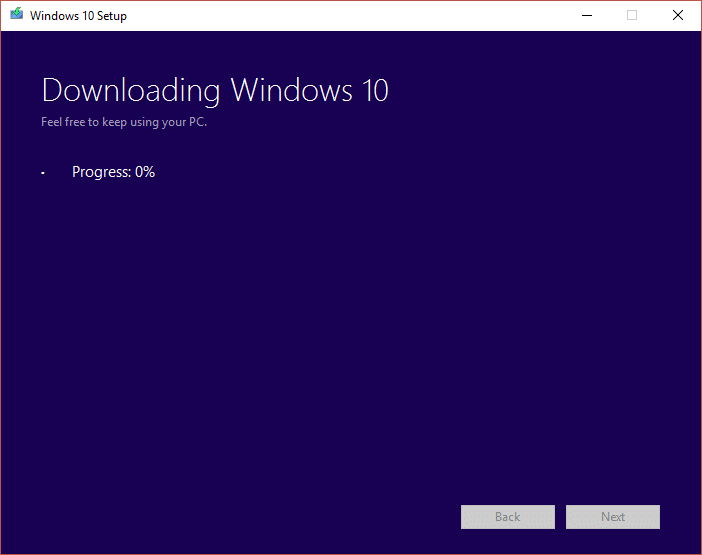
7.Let it download the Windows 10 ISO as it can take some time.
Start Repair from the Installation Media:
1.Once you have downloaded the ISO, mount the ISO with Virtual Clone Drive. 2.Next, double-click on the setup.exe from Windows 10 virtually loaded drive.
3.In the next screen select “Download and install updates” box and click Next.
4.Agree to License terms and conditions.
5.Now follow on-screen instructions in which you have to just click Next. 6.The last dialog box is very important which has a title “Choose what to keep.”
7.Make sure to select “Keep personal files, apps, and Windows settings” box and then press Next to begin the repair installation. 8.Your PC will automatically reboot several times during the system image is being refreshed without losing your data. That’s you have successfully learned How to Repair Install Windows 10 Easily but if you still have any queries regarding this post feel free to ask them in the comments section.
![]()
![]()